Caramelized onions – the unsung heroes of the kitchen. They add a touch of sweetness, a hint of richness, and a whole lot of flavor to any dish. But let’s be real, mastering the art of caramelizing onions can be a bit intimidating. Fear not, dear reader, for I am here to guide you through the glorious journey of achieving perfectly caramelized onions every time. So grab your apron, sharpen your knives, and get ready to transform those tear-inducing bulbs into caramelized perfection with these 5 foolproof tips. Let’s caramelize, shallot we
Contents
Key Ingredients for Perfect Caramelized Onions
**Onions:** The star of the show, you can’t have caramelized onions without, well, onions! We recommend using sweet yellow onions for a milder flavor or red onions for a bolder taste. Just make sure to slice them thinly and evenly to ensure even caramelization. If you’re feeling adventurous, you can also try using shallots or Vidalia onions for a different twist.
**Butter:** Ah, butter, the magic ingredient that takes caramelized onions to the next level. Not only does it add a rich and luxurious flavor, but it also helps the onions caramelize evenly and prevents them from burning. Feel free to use as much butter as your heart desires – after all, everything tastes better with butter!
**Sugar:** While some purists might scoff at the idea of adding sugar to caramelized onions, we say why not?! A touch of sugar can help speed up the caramelization process and add an extra layer of sweetness to the onions. Plus, who doesn’t love a hint of sweetness in their savory dishes?
**Patience:** Last but certainly not least, the most important ingredient for perfect caramelized onions is patience. It takes time for the onions to slowly cook down and develop their sweet, caramelized flavor, so don’t rush the process. Just sit back, relax, and let the magic happen. Trust us, it’ll be worth the wait!
Choosing the Right Pan for Even Cooking
When it comes to cooking, selecting the right pan can make all the difference in creating a delicious meal. No one wants their food to be burnt on one side and undercooked on the other. To ensure even cooking, follow these tips:
First and foremost, consider the material of the pan. Nonstick pans are great for cooking delicate foods like eggs and fish, while cast iron pans are perfect for searing meats and creating a nice crust. Stainless steel pans are versatile and can be used for a variety of dishes. Make sure to choose a pan that is suitable for the type of cooking you will be doing.
Next, pay attention to the size of the pan. A pan that is too small will overcrowd the ingredients, making it difficult for them to cook evenly. On the other hand, a pan that is too large may cause the food to spread out too thinly and cook too quickly. Find a pan that is just the right size for the amount of food you are preparing.
Lastly, don’t forget about the shape of the pan. A saute pan is great for dishes that require flipping or tossing, while a grill pan has raised ridges that create those coveted grill marks. Consider the shape of the pan based on the cooking technique you will be using.
Patience is a Virtue: Slow and Low Heat is Key
When it comes to cooking, patience truly is a virtue. Whether you’re simmering a stew, roasting a turkey, or baking a cake, the key is to keep the heat slow and low. This allows the flavors to develop and meld together in perfect harmony.
Imagine trying to rush a slow-cooked beef Bourguignon by cranking up the heat to high. You’d end up with tough, chewy meat and burnt vegetables. No, no, we must show restraint and let the dish simmer gently on the stove, filling the kitchen with mouthwatering aromas.
And let’s not forget about baking – if you blast a cake with high heat, it may rise quickly, but it’ll also collapse just as fast. Instead, we must preheat the oven to a moderate temperature and let the batter bake slowly and evenly, resulting in a perfectly fluffy confection.
So remember, when you’re in the kitchen, take a deep breath, put on some music, and embrace the slow and low heat. Your taste buds will thank you for it!
Stirring Techniques for Even Browning
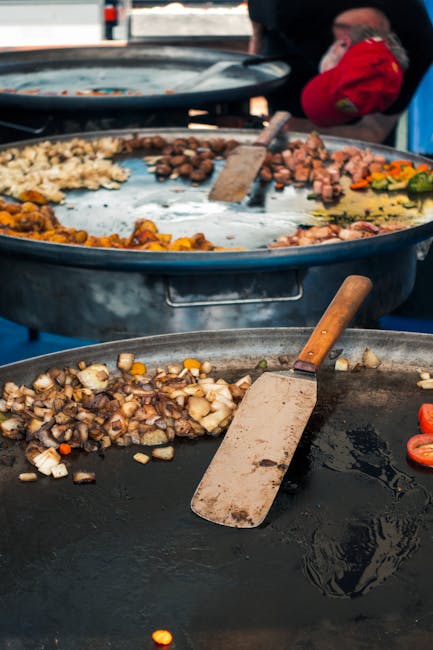
When it comes to achieving that perfect golden brown color on your food, mastering the art of stirring is crucial. Here are some techniques to help you get that even browning every time:
- Constant Vigilance: Keep an eagle eye on your food as it cooks. Don’t get distracted by that cute cat video on your phone - the key is to stir, stir, stir!
- Figure-8 Swirl: Instead of the usual circular stirring motion, try stirring in a figure-8 pattern. This will help distribute heat more evenly and prevent hot spots.
- Raise the Roof: Literally. Lift the pan off the heat and give it a quick toss in the air. Okay, maybe don’t try this one at home - unless you want your dinner all over the floor!
Remember, practice makes perfect. Don’t be discouraged if your first few attempts at even browning are a little off. Keep stirring, keep experimenting, and soon you’ll be a master at achieving that beautiful golden hue on your dishes.
Adding a Touch of Sweetness: How to Enhance Flavor
When it comes to enhancing flavor in your dishes, adding a touch of sweetness can be a game-changer. Here are some fun and tasty ways to achieve that perfect balance of sweet and savory:
- **Honey, Honey:** A drizzle of honey can elevate the flavors of many dishes, from roasted vegetables to grilled meats. Don’t be afraid to get creative with different varieties like wildflower or lavender honey for a unique twist.
- **Fruity Fun:** Incorporating fresh or dried fruits like apricots, figs, or cranberries can add a natural sweetness and texture to your recipes. Think beyond the typical fruit salads and try adding them to savory dishes like stir-fries or salads.
- **Spice It Up:** Spices like cinnamon, nutmeg, and ginger can bring a warm and subtly sweet flavor to your dishes. Experiment with adding a pinch of these spices to your favorite recipes, like soups or stews, for a delightful surprise.
Remember, a little sweetness goes a long way, so start small and taste as you go. With these tips, you’ll be able to enhance the flavor of your dishes and impress your friends and family with your newfound culinary skills. Happy cooking!
The Perfect Pairing: Foods that Complement Caramelized Onions
When it comes to caramelized onions, the possibilities are endless! These sweet and savory gems can elevate any dish to a whole new level. And the best part? They pair perfectly with a wide variety of foods. Here are some delicious combinations to try:
Cheese: Caramelized onions and cheese are a match made in heaven. Whether you’re topping a grilled cheese sandwich, sprinkling them over a cheesy pizza, or melting them into a gooey fondue, you can’t go wrong with this classic pairing.
Meat: From juicy burgers to tender steaks, caramelized onions can take your meat dishes to the next level. Try adding them to a French onion soup, topping a juicy burger, or stirring them into a rich beef stew for a flavor-packed meal.
Veggies: Don’t underestimate the power of caramelized onions to transform your veggie dishes. Whether you’re mixing them into a roasted vegetable medley, layering them into a savory tart, or adding them to a creamy risotto, caramelized onions bring a depth of flavor that can’t be beaten.
FAQs
Why do caramelized onions take so long to cook?
Caramelized onions are like the slowest burn at a barbeque – they need time to break down and release their sweet, caramel goodness. So be patient, my friend. Good things come to those who wait.
How can I prevent my onions from burning?
Don’t be a daredevil and crank up the heat to high. Low and slow is the way to go with caramelized onions. Keep an eye on them and stir occasionally to make sure they’re not getting too toasty.
What’s the best type of onion to use for caramelizing?
Sweet onions like Vidalia or Walla Walla are your best bet for caramelizing. They have a higher sugar content, which means they’ll caramelize beautifully and bring all the flavor to the party.
Do I have to add sugar to caramelize onions?
No need to sprinkle sugar on your onions like fairy dust. The natural sugars in the onions will do the job just fine. Just give them time to work their magic.
Can I store caramelized onions for later use?
Absolutely! Caramelized onions are like fine wine – they get better with age. Store them in an airtight container in the fridge for up to a week, or freeze them for longer storage. Just be prepared to have people lining up at your door for a taste of your caramelized mastery.
—
Don’t Cry Over Un-Caramelized Onions
Congratulations! You are now officially an onion whisperer, a master of caramelization, a champion of all things sweet, savory, and oh-so delicious. So go forth, armed with these foolproof tips, and dazzle your friends and family with your caramelized onion prowess. Just remember, if all else fails, don’t be afraid to shed a tear or two – after all, onions aren’t the only ones who can get a little emotional in the kitchen. Happy cooking!

