
Introducing the tantalizingly tasty and outrageously irresistible vegetarian Russian pirozhki recipe that will have you saying “da, da” to seconds and thirds! Forget bland tofu and boring salads, these savory pastries are bursting with flavor and sure to tickle your taste buds in all the right places. So buckle up and prepare to embark on a mouthwatering culinary journey to Russia, without ever leaving your kitchen. Let’s get ready to pirozhki and roll!
Contents
ingredients-for-vegetarian-russian-pirozhki”>Ingredients for Vegetarian Russian Pirozhki
Want to make some delicious Vegetarian Russian Pirozhki? Look no further, we’ve got all the ingredients you need right here:
- Potatoes – because what’s a Russian dish without some good ol’ spuds?
- Onions – for that perfect savory flavor that makes your taste buds tango
- Mushrooms - adding that extra umami goodness that will make you say, “Da!”
- Eggs – to bind it all together like a delicious edible glue
But wait, there’s more!
- Flour – because what’s a pirozhki without a flaky, buttery crust?
- Butter – for that rich, indulgent taste that will have you licking your fingers
- Milk – to make the dough oh-so-soft and tender, like a Russian bear’s fur
- Salt – to season it all just right, like a sprinkle of snow in Siberia
So there you have it, all the ingredients you need to whip up some tasty Vegetarian Russian Pirozhki. Get cooking and impress your friends with your culinary skills!

Preparing the Dough for the Pirozhki
First things first, you need to gather all your ingredients and get ready to get your hands dirty (literally). Don’t be afraid to roll up those sleeves – it’s going to be worth it once you take that first heavenly bite of a warm, flaky pirozhki!
Start by mixing together the flour, salt, sugar, and yeast in a large bowl. Don’t be shy with the flour – the dough needs to be just the right consistency to hold all that delicious filling without falling apart. You’ll know you’ve hit the sweet spot when it’s no longer sticking to your hands like glue.
Next, pour in the warmed milk and melted butter, and mix everything together until it forms a smooth, elastic dough. Feel free to give it a good workout - kneading is a great stress reliever, after all! Once you get that perfect doughy texture, cover the bowl and let it rest and rise for about an hour.
When the dough has doubled in size, it’s time to divide it into smaller portions to make those cute little pirozhki. Roll out each piece into a thin circle, plop in your desired filling, and seal it up tight like a little doughy pocket of joy. Pop them in the oven, and in no time, you’ll have a batch of golden, flaky pirozhki that’ll have your taste buds dancing in delight!
Making the Savory Filling for the Pirozhki
Alright, it’s time to get down to business and whip up the delicious savory filling for our pirozhki. Trust me, this filling is so good, you might just want to eat it straight out of the bowl (but maybe resist that temptation).
First things first, let’s gather all our ingredients. Think of it like a culinary scavenger hunt, but without the running around. You’ll need:
- Ground beef (or substitute with your choice of protein)
- Onions, finely chopped
- Garlic, minced
- Potatoes, diced
- Carrots, grated
- Salt, pepper, and any other seasonings you desire
Next, it’s time to get cooking! Heat up a pan and brown the ground beef until it’s nice and crumbly. Add in the onions and garlic, sautéing until they’re soft and fragrant. Then toss in the potatoes and carrots, stirring everything together until they’re cooked through and tender.
Season the filling to taste with salt, pepper, and any other flavors you want to jazz it up with. Maybe a pinch of paprika for some smokiness, or a sprinkle of dill for that herby freshness. Get creative and make this filling your own!
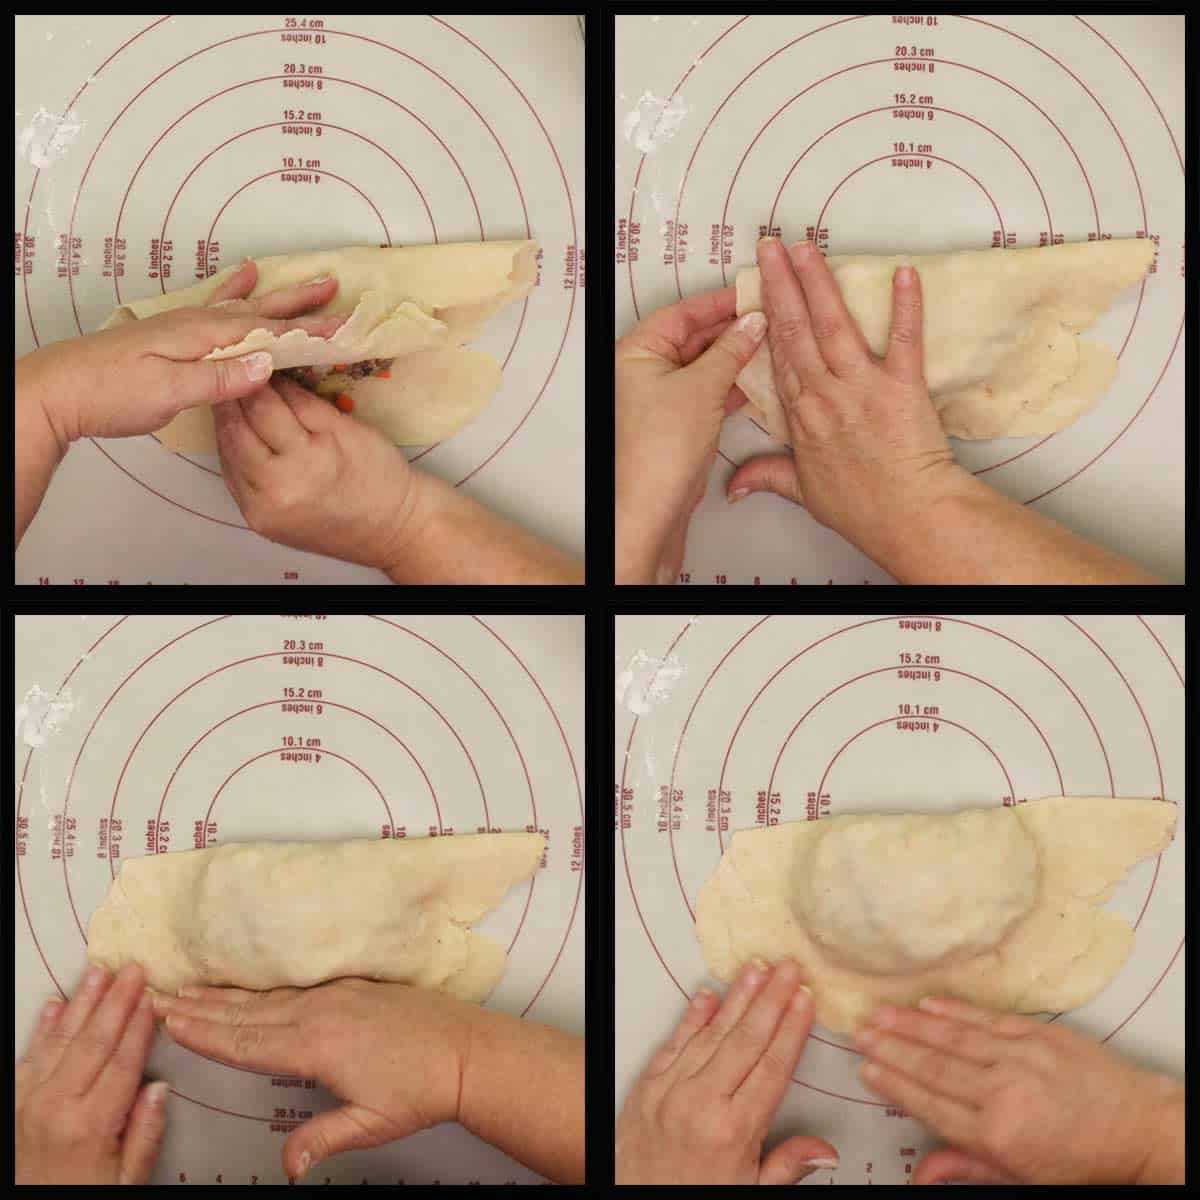
Assembling and Shaping the Pirozhki
Now comes the fun part – assembling and shaping your delicious pirozhki! Get ready to show off your skills and create some mouth-watering treats that are sure to impress your friends and family.
Start by rolling out your dough on a floured surface until it’s about 1/4 inch thick. Using a round cookie cutter or the rim of a glass, cut out circles of dough to use as the base for your pirozhki. Now for the fun part – filling them with your chosen ingredients. Whether it’s meat, vegetables, or cheese, the possibilities are endless!
Place a spoonful of your filling in the center of each dough circle, making sure not to overfill. Fold the dough in half, creating a half-moon shape, and seal the edges by pinching them together. Pro tip: for a fancier look, you can also crimp the edges with a fork for a decorative touch.
Once all your pirozhki are assembled, place them on a baking sheet lined with parchment paper and brush them with an egg wash for a golden, shiny finish. Pop them in the oven and get ready for your kitchen to smell like a little slice of heaven!
Baking the Pirozhki to Perfection
Alright, now that your pirozhki dough has been rolled out and filled with delicious fillings, it’s time to bake them to perfection! Follow these tips to ensure your pirozhki come out golden brown and oh so tasty:
- Preheat your oven to 375°F. You want it nice and hot to get that perfect crispy crust!
- Place your filled pirozhki on a baking sheet lined with parchment paper. Make sure to leave some space between them so they can puff up and get beautifully browned on all sides.
- Brush the tops of your pirozhki with a beaten egg to give them that gorgeous shiny finish. This not only makes them look more appetizing but also helps them brown up nicely.
Pop those bad boys in the oven and let them bake for about 20-25 minutes, or until they are golden brown and crispy on the outside. Keep an eye on them towards the end to make sure they don’t burn!
Once your pirozhki are done baking, take them out of the oven and let them cool for a few minutes before serving. Enjoy your hot, crispy, and oh so delicious pirozhki with your favorite dipping sauce or just on their own!
Serving and Enjoying the Delicious Russian Pirozhki
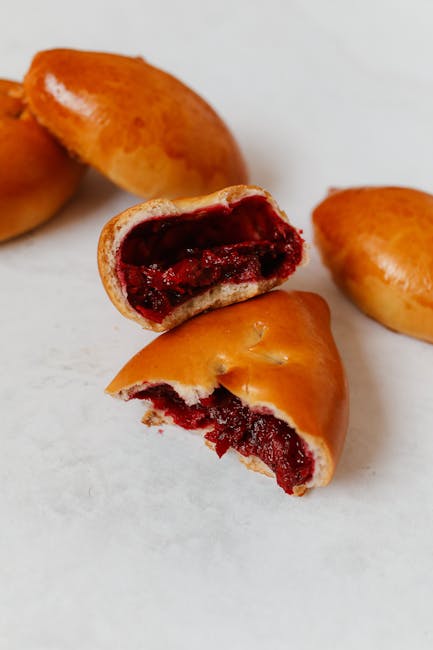
Are you ready to indulge in the delightful world of Russian pirozhki? These delectable stuffed pastries are sure to tickle your taste buds and leave you wanting more! Whether you prefer them baked or fried, savory or sweet, there’s a pirozhki out there for everyone.
When it comes to serving up these tasty treats, the options are endless. Throw a pirozhki party and impress your guests with a variety of fillings, from classic beef and onion to indulgent chocolate and cream cheese. Don’t forget to top them off with a dollop of sour cream or a sprinkle of fresh dill for that authentic Russian flavor!
Now, for the best part – enjoying your perfectly baked or fried pirozhki! Take a savory bite and savor the flavorful filling bursting with every mouthful. Or indulge in a sweet pirozhki and let the warm, gooey center melt in your mouth. Whether you eat them as a quick snack on the go or as a sit-down meal, there’s no wrong way to enjoy a pirozhki.
So, what are you waiting for? Grab a batch of pirozhki dough, gather your favorite fillings, and get ready to tantalize your taste buds with these tasty Russian pastries. Serving and enjoying pirozhki has never been more delicious – bon appétit!
FAQs
Can I customize the filling for my pirozhki?
Absolutely! Feel free to get creative with the fillings for your pirozhki. You can try anything from mushrooms and onions to diced potatoes or even spinach and feta. The possibilities are endless!
Can I make these pirozhki ahead of time?
Yes, you can definitely make these pirozhki ahead of time. Simply bake them as directed, let them cool, and then store them in an airtight container in the fridge. When you’re ready to enjoy them, just pop them in the oven to heat them up.
Is there a gluten-free option for this recipe?
Yes, you can make a gluten-free version of these pirozhki by using a gluten-free flour blend in place of the all-purpose flour. Just make sure to check the labels on all your other ingredients to ensure they are gluten-free as well.
Can I freeze these pirozhki?
Yes, you can freeze these pirozhki for later. Once the pirozhki have cooled completely, place them in a single layer on a baking sheet and pop them in the freezer. Once frozen solid, transfer them to a freezer-safe bag or container. When you’re ready to eat them, just pop them in the oven to reheat.
What can I serve with these vegetarian pirozhki?
These pirozhki are delicious on their own, but if you want to make a meal out of them, you can serve them with a side of sauerkraut, a dollop of sour cream, or some pickles for a true Russian experience. Enjoy!
—
Say ”Da” to these Delectable Delights!
So there you have it, folks – a vegetarian twist on a classic Russian favorite that is sure to satisfy even the most carnivorous of appetites. Whether you’re a seasoned chef or a kitchen novice, these pirozhki are sure to impress with their flaky crust and savory filling. So grab your rolling pin and get ready to channel your inner babushka as you whip up a batch of these deliciously savory treats. Remember, in the immortal words of Ivan Pavlov, “Come for the pirozhki, stay for the flavor!” Bon appétit!

