
Picture this: a piping hot pizza fresh out of the oven, with gooey cheese stretching between each slice as you take your first bite. Sounds like a dream, right? Well, believe it or not, mastering the art of kneading is the secret ingredient to achieving pizza perfection. So, grab your rolling pin and get ready to dough the right thing, because we’ve got some essential tips to help you become a pizza-making prodigy in no time!
Contents
ingredients-and-ratios”>Understanding the Dough: Key Ingredients and Ratios
When it comes to making the perfect dough, it’s all about understanding the key ingredients and ratios that go into it. Let’s break it down, shall we?
First off, let’s talk about the star of the show: flour. This versatile ingredient is what gives the dough its structure and texture. Whether you prefer all-purpose flour, bread flour, or whole wheat flour, the key is to use the right type for the job. Experiment with different flours to find the perfect balance for your dough.
Next up, we have water. This humble ingredient might seem boring, but it plays a crucial role in hydrating the flour and activating the gluten. Too much water, and you’ll end up with a soggy mess. Too little, and your dough will be dry and crumbly. Finding the right water-to-flour ratio is key to a successful dough.
And let’s not forget about yeast! This tiny organism is what makes the dough rise and gives it that perfect fluffy texture. Whether you’re using instant yeast, active dry yeast, or sourdough starter, make sure to give it enough time to work its magic. Patience is a virtue when it comes to dough making!
The Kneading Technique: Proper Methods and Timing
When it comes to kneading your dough, timing is everything. You can’t rush the process or your bread will end up as dense as a brick. So, take your time and follow these proper methods to achieve the perfect loaf.
Proper Methods:
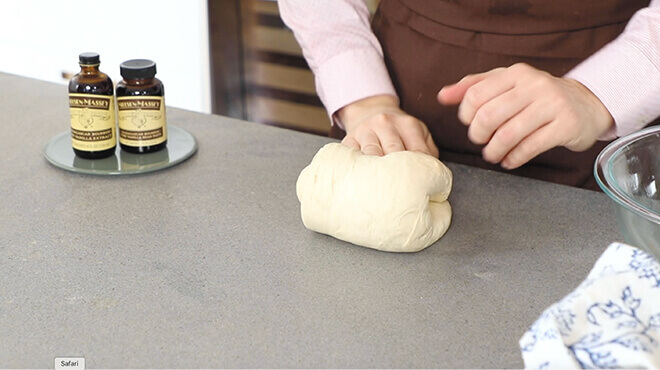
- Don’t be afraid to get your hands dirty. Kneading is a messy job, but someone’s got to do it!
- Use the heel of your hand to press the dough away from you, then fold it back towards you. Repeat this motion until the texture is smooth and elastic.
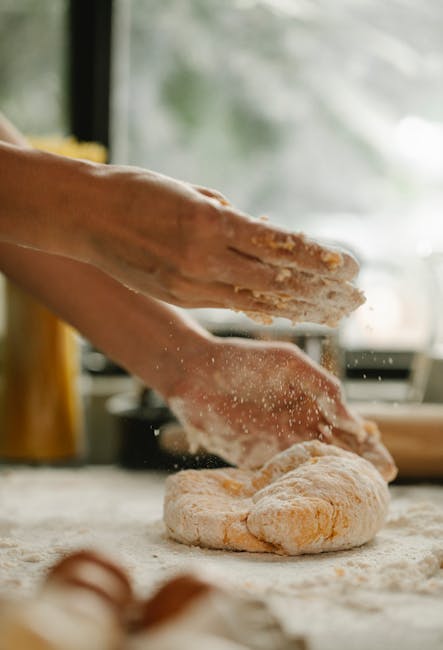
- Add flour sparingly. Too much flour can make your dough tough, so use a light hand when dusting your work surface.
- Always follow the recipe. Each dough requires a different amount of kneading time, so be sure to read the instructions carefully.
Timing is crucial when it comes to kneading. You want to knead your dough until it passes the windowpane test – that is when you can stretch a piece of dough thin enough to see through without it tearing. This usually takes anywhere from 8 to 10 minutes, but don’t worry, you’ll get the hang of it with practice.
Developing the Perfect Texture: Signs of a Well-Kneaded Dough
Have you ever felt like your dough just isn’t living up to its full potential? Like maybe it’s a bit rough around the edges or lacking that certain je ne sais quoi? Well, fear not my fellow bakers, for I am here to guide you on the path to dough perfection!
When it comes to kneading your dough, there are a few telltale signs that you’ve reached dough nirvana. A well-kneaded dough should have a smooth, elastic texture that bounces back when touched. It should be soft and pliable, like a baby’s bottom (well, maybe not THAT soft).
So, how do you know when you’ve achieved dough enlightenment? Here are some signs to look out for:
- Smooth and Elastic: Your dough should be smooth to the touch and stretchy like a giant rubber band.
- No Lumps or Bumps: If your dough is free of any lumps or bumps, you’re on the right track.
- Windowpane Test: Take a small piece of dough and stretch it out between your fingers. If you can see through it without it tearing, you’re golden!
Remember, practice makes perfect when it comes to kneading dough. So don’t be discouraged if your first few attempts aren’t quite up to par. Keep at it, and soon you’ll be a dough-kneading master!
Troubleshooting Common Issues: Over-Kneading and Under-Kneading
So you’ve found yourself in a bit of a sticky situation – either your dough is tough as nails or as soft as a pillow. Fear not, dear bakers! We’re here to help you troubleshoot these common kneading issues.
Let’s start with over-kneading. If your dough feels more like a rubber band than a soft, supple ball of gluten goodness, you may have gone a little overboard with your kneading. The key to avoiding this crunchy catastrophe is to know when to say when. Remember, dough needs love, but not tough love. To prevent over-kneading, keep an eye out for these warning signs:
- Excessive elasticity
- Tough, chewy texture
- Lack of rise
On the flip side, under-kneading can lead to a doughy disaster. If your dough is resembling a sad pile of mush rather than a perfectly proofed masterpiece, you may need to give it a little extra attention. Here are some signs that you may be guilty of under-kneading:
- Sticky, unmanageable texture
- Poor rise and structure
- Inconsistent crumb
So next time you find yourself in a knead of assistance, remember – it’s all about finding that Goldilocks zone of just-right kneading. Happy baking!

Incorporating Flavor: Tips for Enhancing Your Dough with Herbs and Spices
So, you think you’ve got what it takes to take your dough game to the next level? Well, buckle up, because we’re about to take a deep dive into the world of herbs and spices and how they can revolutionize your baking experience.
First things first, let’s talk about herbs. These little green gems pack a powerful flavor punch and can truly elevate your dough to new heights. Think about adding some fresh basil, parsley, or dill to your dough for a burst of freshness that will have your taste buds doing a happy dance.
Now, let’s not forget about spices. These bad boys can add a whole new layer of complexity to your dough. Why not try adding a pinch of cinnamon or nutmeg to your sweet dough for a warm and comforting flavor profile? Or, if you’re feeling adventurous, how about some cayenne pepper or smoked paprika for a spicy kick?
Remember, when it comes to incorporating herbs and spices into your dough, the sky’s the limit. Get creative, experiment, and most importantly, have fun with it! Your taste buds will thank you.
Perfecting the Crust: Achieving the Ideal Thickness and Crispness
When it comes to perfecting the crust on your favorite dish, thickness and crispness are key factors that can make or break your culinary creation. Here are some tips and tricks to help you achieve the ideal crust every time:
First things first, let’s talk thickness. A thin crust can be delicate and crispy, while a thicker crust can provide a heartier bite. Finding the perfect balance between the two is essential. Consider the following:
- Use a rolling pin to evenly flatten your dough to the desired thickness
- Experiment with different thickness levels to see what works best for your dish
Now, onto achieving that coveted crispiness. A crisp crust can elevate your dish from good to great. To achieve optimal crispness, keep these tips in mind:
- Bake your dish at a high temperature for a shorter amount of time for a crispy exterior
- Brushing the crust with olive oil before baking can help create a golden, crispy finish
So there you have it – the secrets to perfecting the crust on your favorite dishes. Whether you prefer a thin, crispy crust or a thick, hearty crust, these tips will help you achieve the ideal thickness and crispness every time. Happy baking!
Mastering the Art: Practice Makes Perfect in Pizza Kneading
So you’ve decided to take your pizza-making skills to the next level and master the art of kneading dough. Congratulations! This is a crucial step in creating the perfect crispy crust and delicious base for all your favorite toppings. But don’t worry, practice makes perfect!
When it comes to kneading pizza dough, consistency is key. You want to aim for a smooth and elastic texture that will result in a light and airy crust. Don’t be afraid to get your hands dirty and really dive in – the more you knead, the better your dough will be.
Remember, Rome wasn’t built in a day – and neither was the perfect pizza crust. It may take some time and a few failed attempts, but with perseverance and a sense of humor, you’ll get there. So roll up your sleeves, dust your hands with flour, and get ready to become a pizza-kneading pro!
Here are a few tips to keep in mind as you practice your pizza-kneading skills:
- Start with room temperature dough for easier handling
- Use a light touch and gentle pressure to avoid overworking the dough
- Practice makes perfect – the more you knead, the better you’ll get!
FAQs
Why is kneading important in making pizza dough?
Kneading helps develop gluten in the dough, giving it structure and elasticity. This is essential for a chewy and airy crust.
How long should I knead my pizza dough for?
Typically, you should knead your pizza dough for about 8-10 minutes. This ensures that the dough is properly developed and smooth.
What’s the best technique for kneading pizza dough?
The best technique is to push the dough away from you with the heel of your hand, fold it over, and then rotate it a quarter turn. Repeat this process until the dough is smooth and elastic.
Can I over-knead pizza dough?
Yes, you can over-knead pizza dough, which can result in a tough crust. It’s important to stop kneading once the dough is smooth and elastic.
Any tips for making the kneading process easier?
Use a bench scraper to help gather and fold the dough during kneading. This will help keep your work surface clean and make the process more manageable.
Should I let my dough rest after kneading?
Yes, it’s a good idea to let your dough rest for about 20-30 minutes after kneading. This allows the gluten to relax, making it easier to shape the dough later.
—
So go forth, pizza enthusiasts, and knead your dough with confidence!
Whether you’re a seasoned pro or a newbie in the kitchen, mastering the art of kneading is essential for achieving that perfect pizza crust. With these tips and tricks in your arsenal, you’ll be well on your way to creating delicious pies that would make any Italian grandmother proud.
Remember, practice makes perfect, so don’t be discouraged if your first few attempts don’t turn out exactly as you hoped. Keep kneading, keep experimenting, and most importantly, keep enjoying the fruits of your labor. Happy baking! 🍕👩🍳👨🍳

